Wall-mounted Holder for the
Gigaset S850HX Cordless Phone
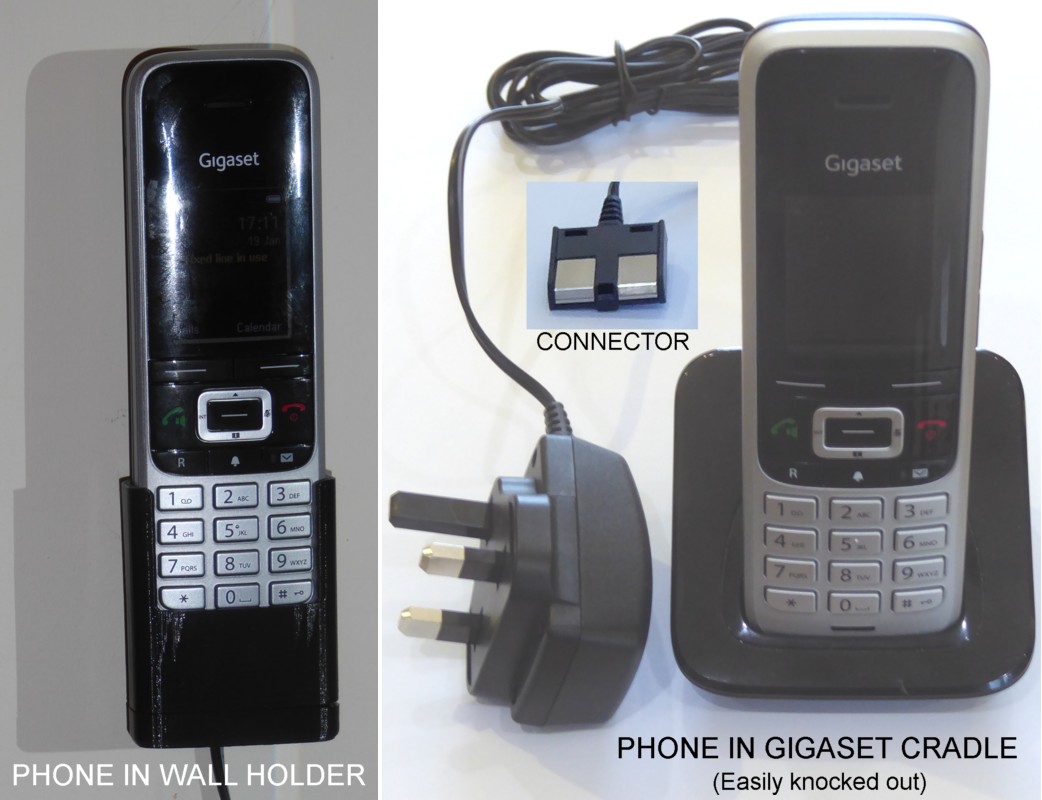
The charging "cradles" which Gigaset provides stand on horizontal surfaces - but, although they can be wall-mounted, the phone is about 35mm off the wall and is not retained, so it can easily be knocked out of the cradle and broken.
I have designed and built some phone holders which hold our domestic cordless phones securely close to walls. There were a number of challenges.
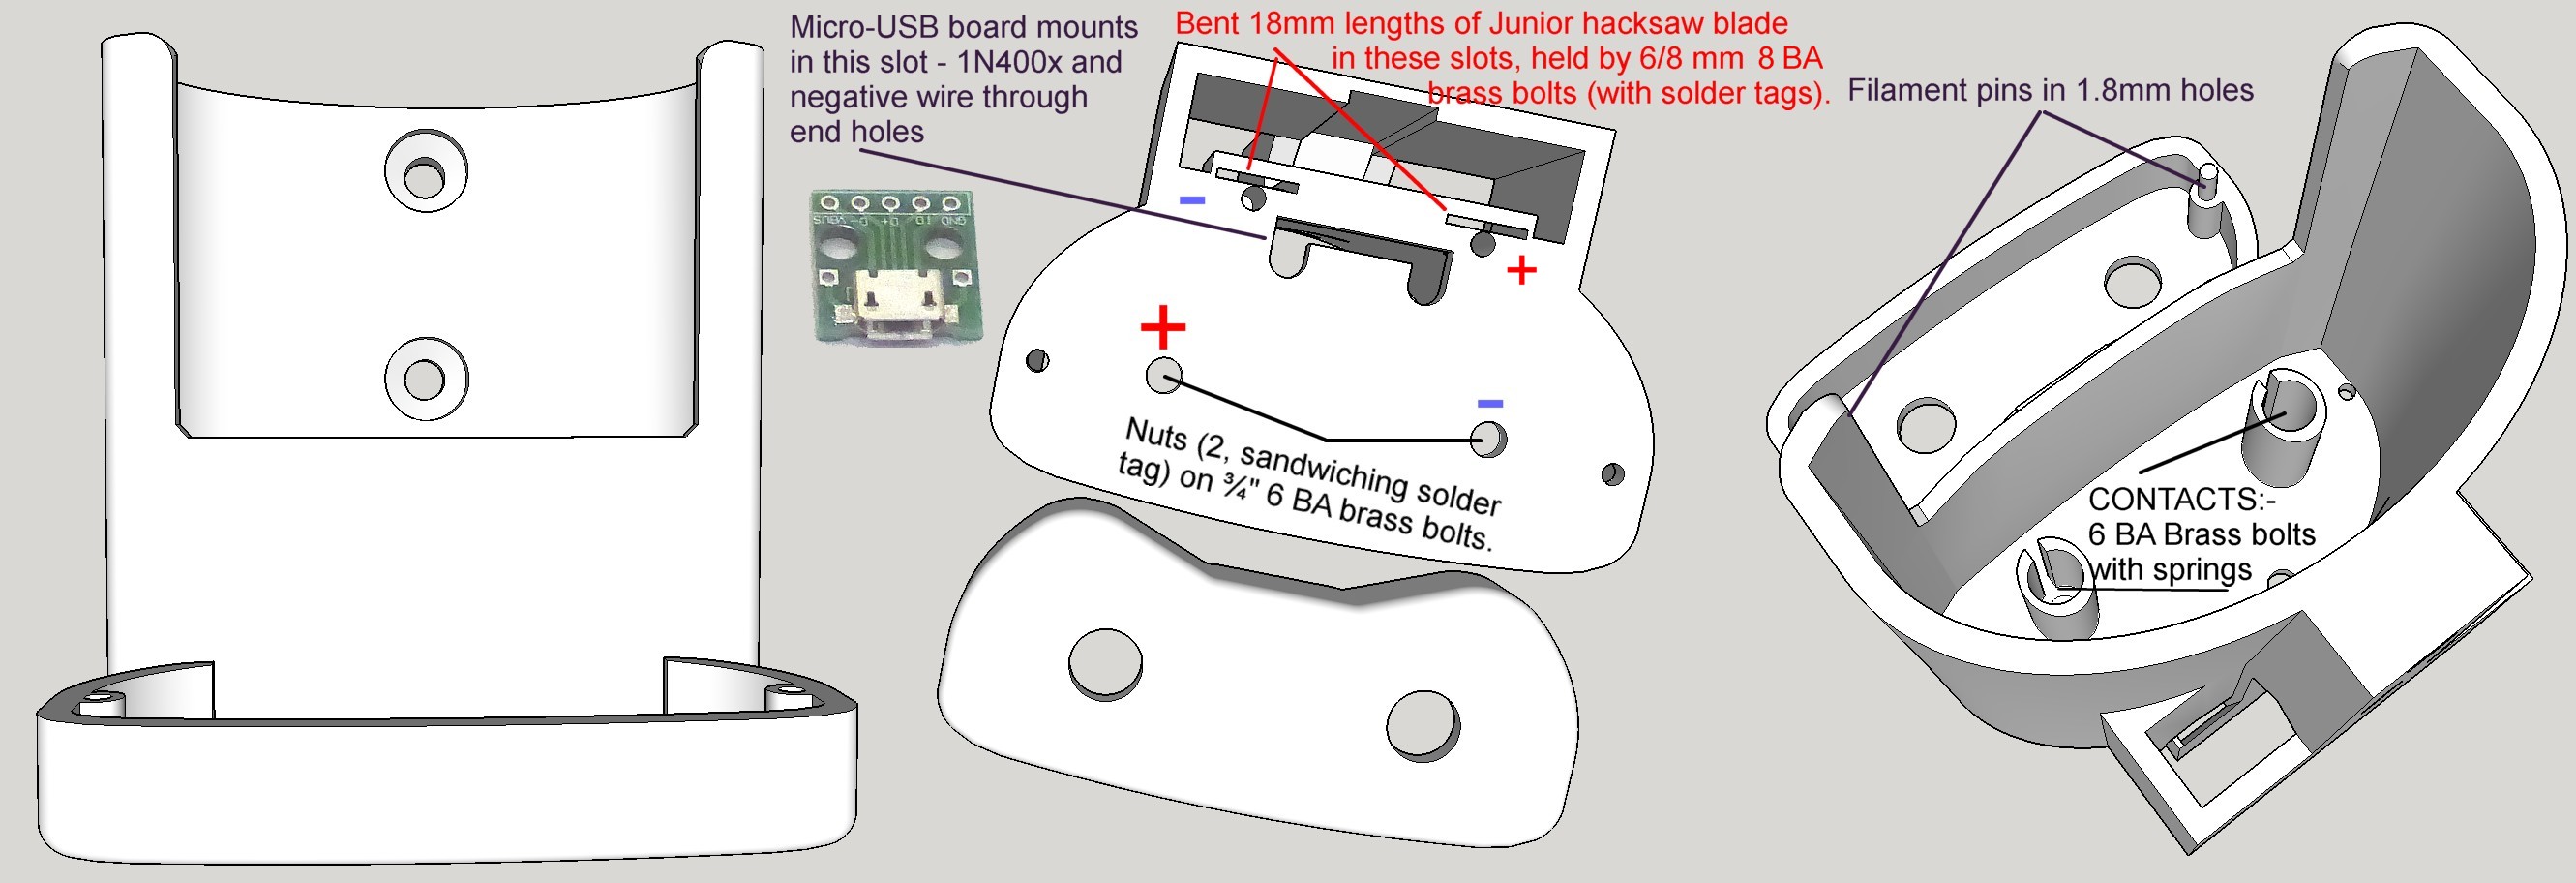
My first design used fixed steel M3 bolt heads as the charging contacts. Steel/steel contacts are often high resistance, so my first change was to use brass. This was still unsatisfactory because contacts got dirty, so I next used a long brass bolt with a spring to provide rubbing pressure as the contact is made and broken - the spring was cannibalised from a disposable ballpoint pen. These often contain a 3 cm spring about 2.8mm ID / 2.95 mm OD which I never throw away - they're so often useful in 3D printed objects which need a small spring (springs from liquid soap dispensers are good when you need a larger one). Cut in half each half is ideal to push a three-quarter inch (18mm) 6 BA roundhead bolt - which is just the right diameter to fit in one of the contact pillars (5 mm ID). It might be possible to use M2.5 or M3 bolts, but the heads would need to be reduced in diameter to ~4.5mm - not particularly difficult, but tedious when 6BA bolts are available.
It is important to ream the pillar centres and the bolt-holes clean to 5mm and 7/64" (~2.8mm, but 3mm should be OK) respectively so that the spring contacts can move freely.
I did not wish to damage the charger for Gigaset's own cradle by changing connectors, but their connector is a weird flat thing and I had to design a socket for it at the back of the cradle. Again spring pressure for contact is a good idea - in this case the 'springs' are two 18mm lengths of Junior hacksaw blade (springy but bendable steel 6.2×18×0.45mm), bent 10° at 10mm from their bottoms and cleaned bright and free of their blue oxide. I first used steel self-tap screws to secure them, but again found that steel/steel contacts are not reliable and replaced these with quarter inch (6mm) 8 BA brass bolts.
The S850HX cordless phone can also be charged via a Micro USB plug from a standard USB charger, but if a USB lead were plugged into the phone in the cradle detaching it to answer a call would be a nuisance. When I investigated the USB charging circuitry I discovered that the USB charge input simply connected to the Gigaset charge input within the phone via a 1N4001 1A diode. I therefore decided to include a USB charging option - a small board from eBay carrying a Micro USB socket to which I added a 1N4001 diode (any of the 1N4000 series would be satisfactory). This board connects 5V (via a diode) in parallel with the feed from the Gigaset charge plug to the spring-loaded 6BA brass bolt contacts.
Electrical connections to the 6 BA and 8 BA bolts use solder tags. Wiring to the solder tags must be done before they are assembled - otherwise the PETG will melt as they are soldered. Wiring must be floppy, as the solder tags move a few mm when the phone is inserted into or removed from its holder and stiff wires would fatigue and break.
Designing the phone holder was demanding - the phone is not a simple shape and it must enter the holder with a little friction and present its contacts to the holder contacts accurately. I did this by printing 1mm thick test sections of the holder for positions at 5mm intervals along the bottom third of the phone and measuring how my estimate of the shape differed from the actual shape required. Some other Gigaset cordless handsets are the same shape as the S850HX and can use this holder, sadly many others are not.
STL and X100 Sketchup files are at "http://www.jbryant.eu/S850HX-Holder.stl and "http://www.jbryant.eu/S850HX-Holder.skp respectively.
Since the 6BA nuts and bolts move it is best to protect them with a cover. This uses two plugs of 1.75mm PETG filament to locate itself accurately below the main structure. These plugs are welded to the cover with DCM but rely on friction to hold it onto the main structure.
This is a page on the James Bryant (G4CLF) Web-site.
Return to James Bryant's Home Page